Here are some pics of assembled shields
Hi guys,
The first BrewPi shields are ready for testing. I will try to update the code for the new shields this week and in the meantime I am also looking for the best place to buy the parts. Unfortunately I can already tell you that connectors are expensive, especially when you want high quality ones. Suggestions are welcome.
I cannot comment on the price of the kit until I have found the right suppliers. I still hope to start selling these in January.
For those interested on how I do the SMD assembly: check out this gallery on imgur.
Finally, I have started an IRC channel for BrewPi on Freenode. I am always logged in, so if you want to chat with me directly, this is the easiest way. Please come and chat about beer and electronics!
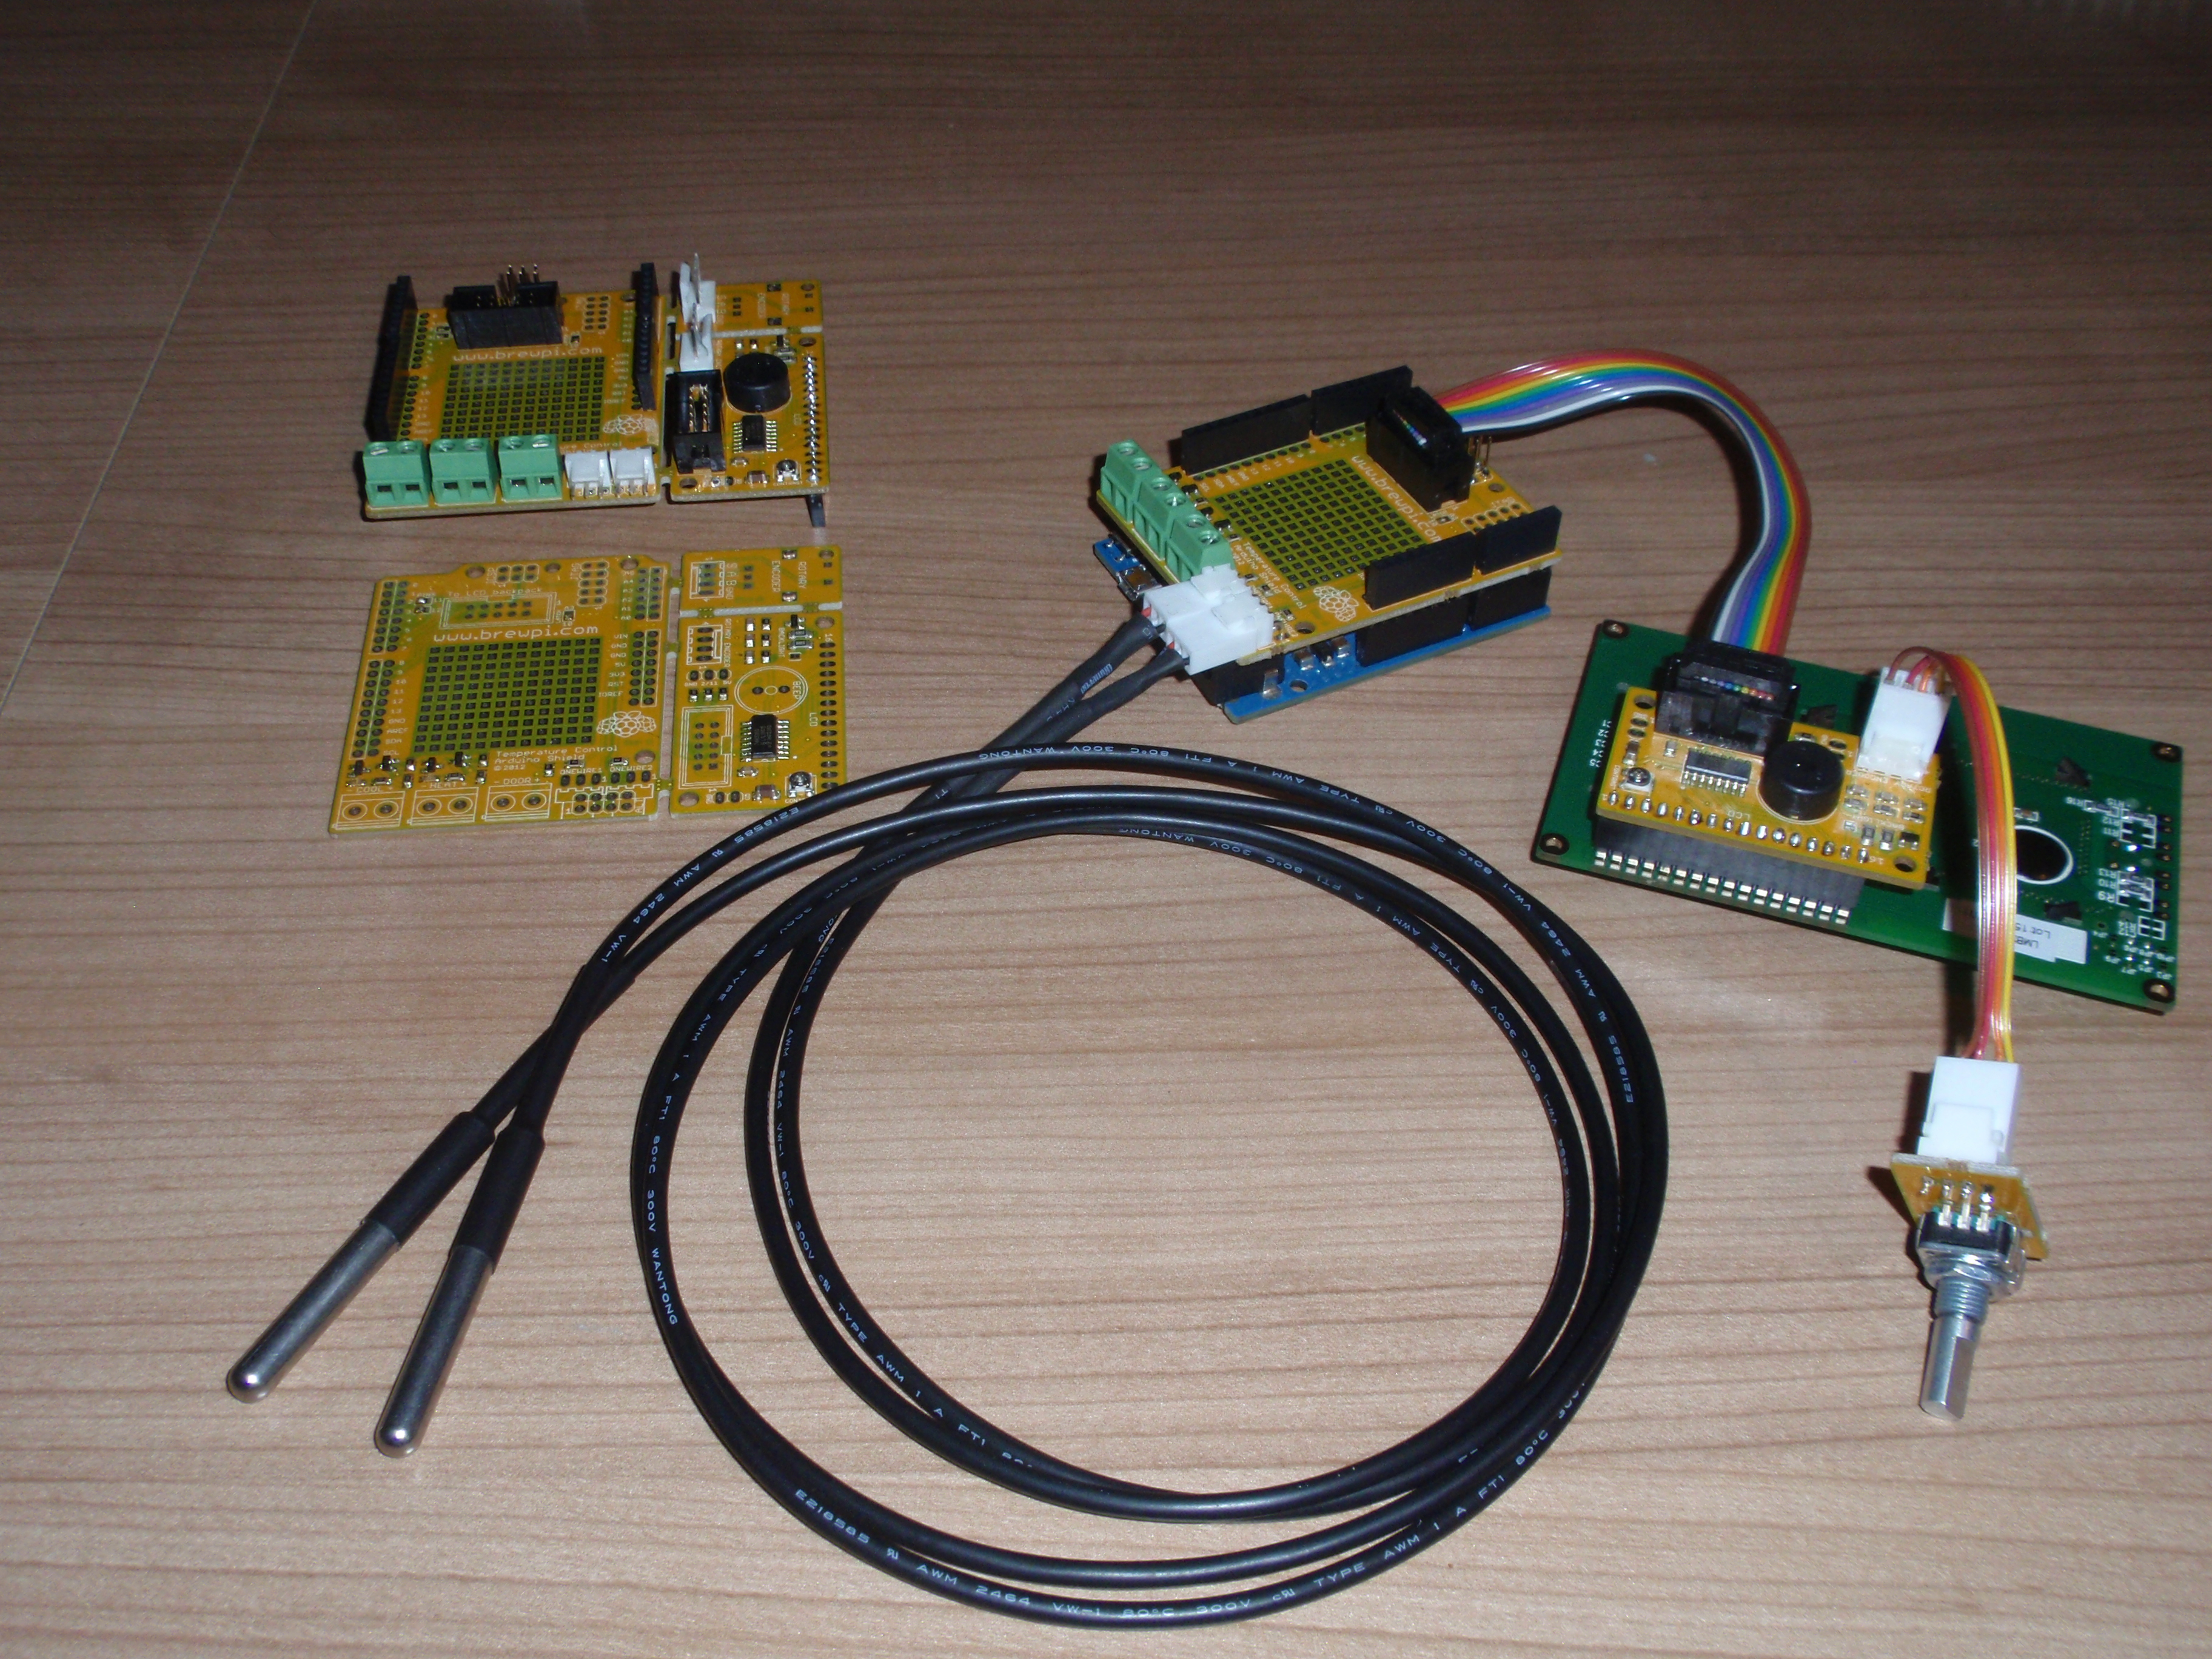
Here are the boards in 3 stages: Just SMD assembled, all components assembled and ready for testing: LCD connected, temperature sensors connected and all breakout boards connected.
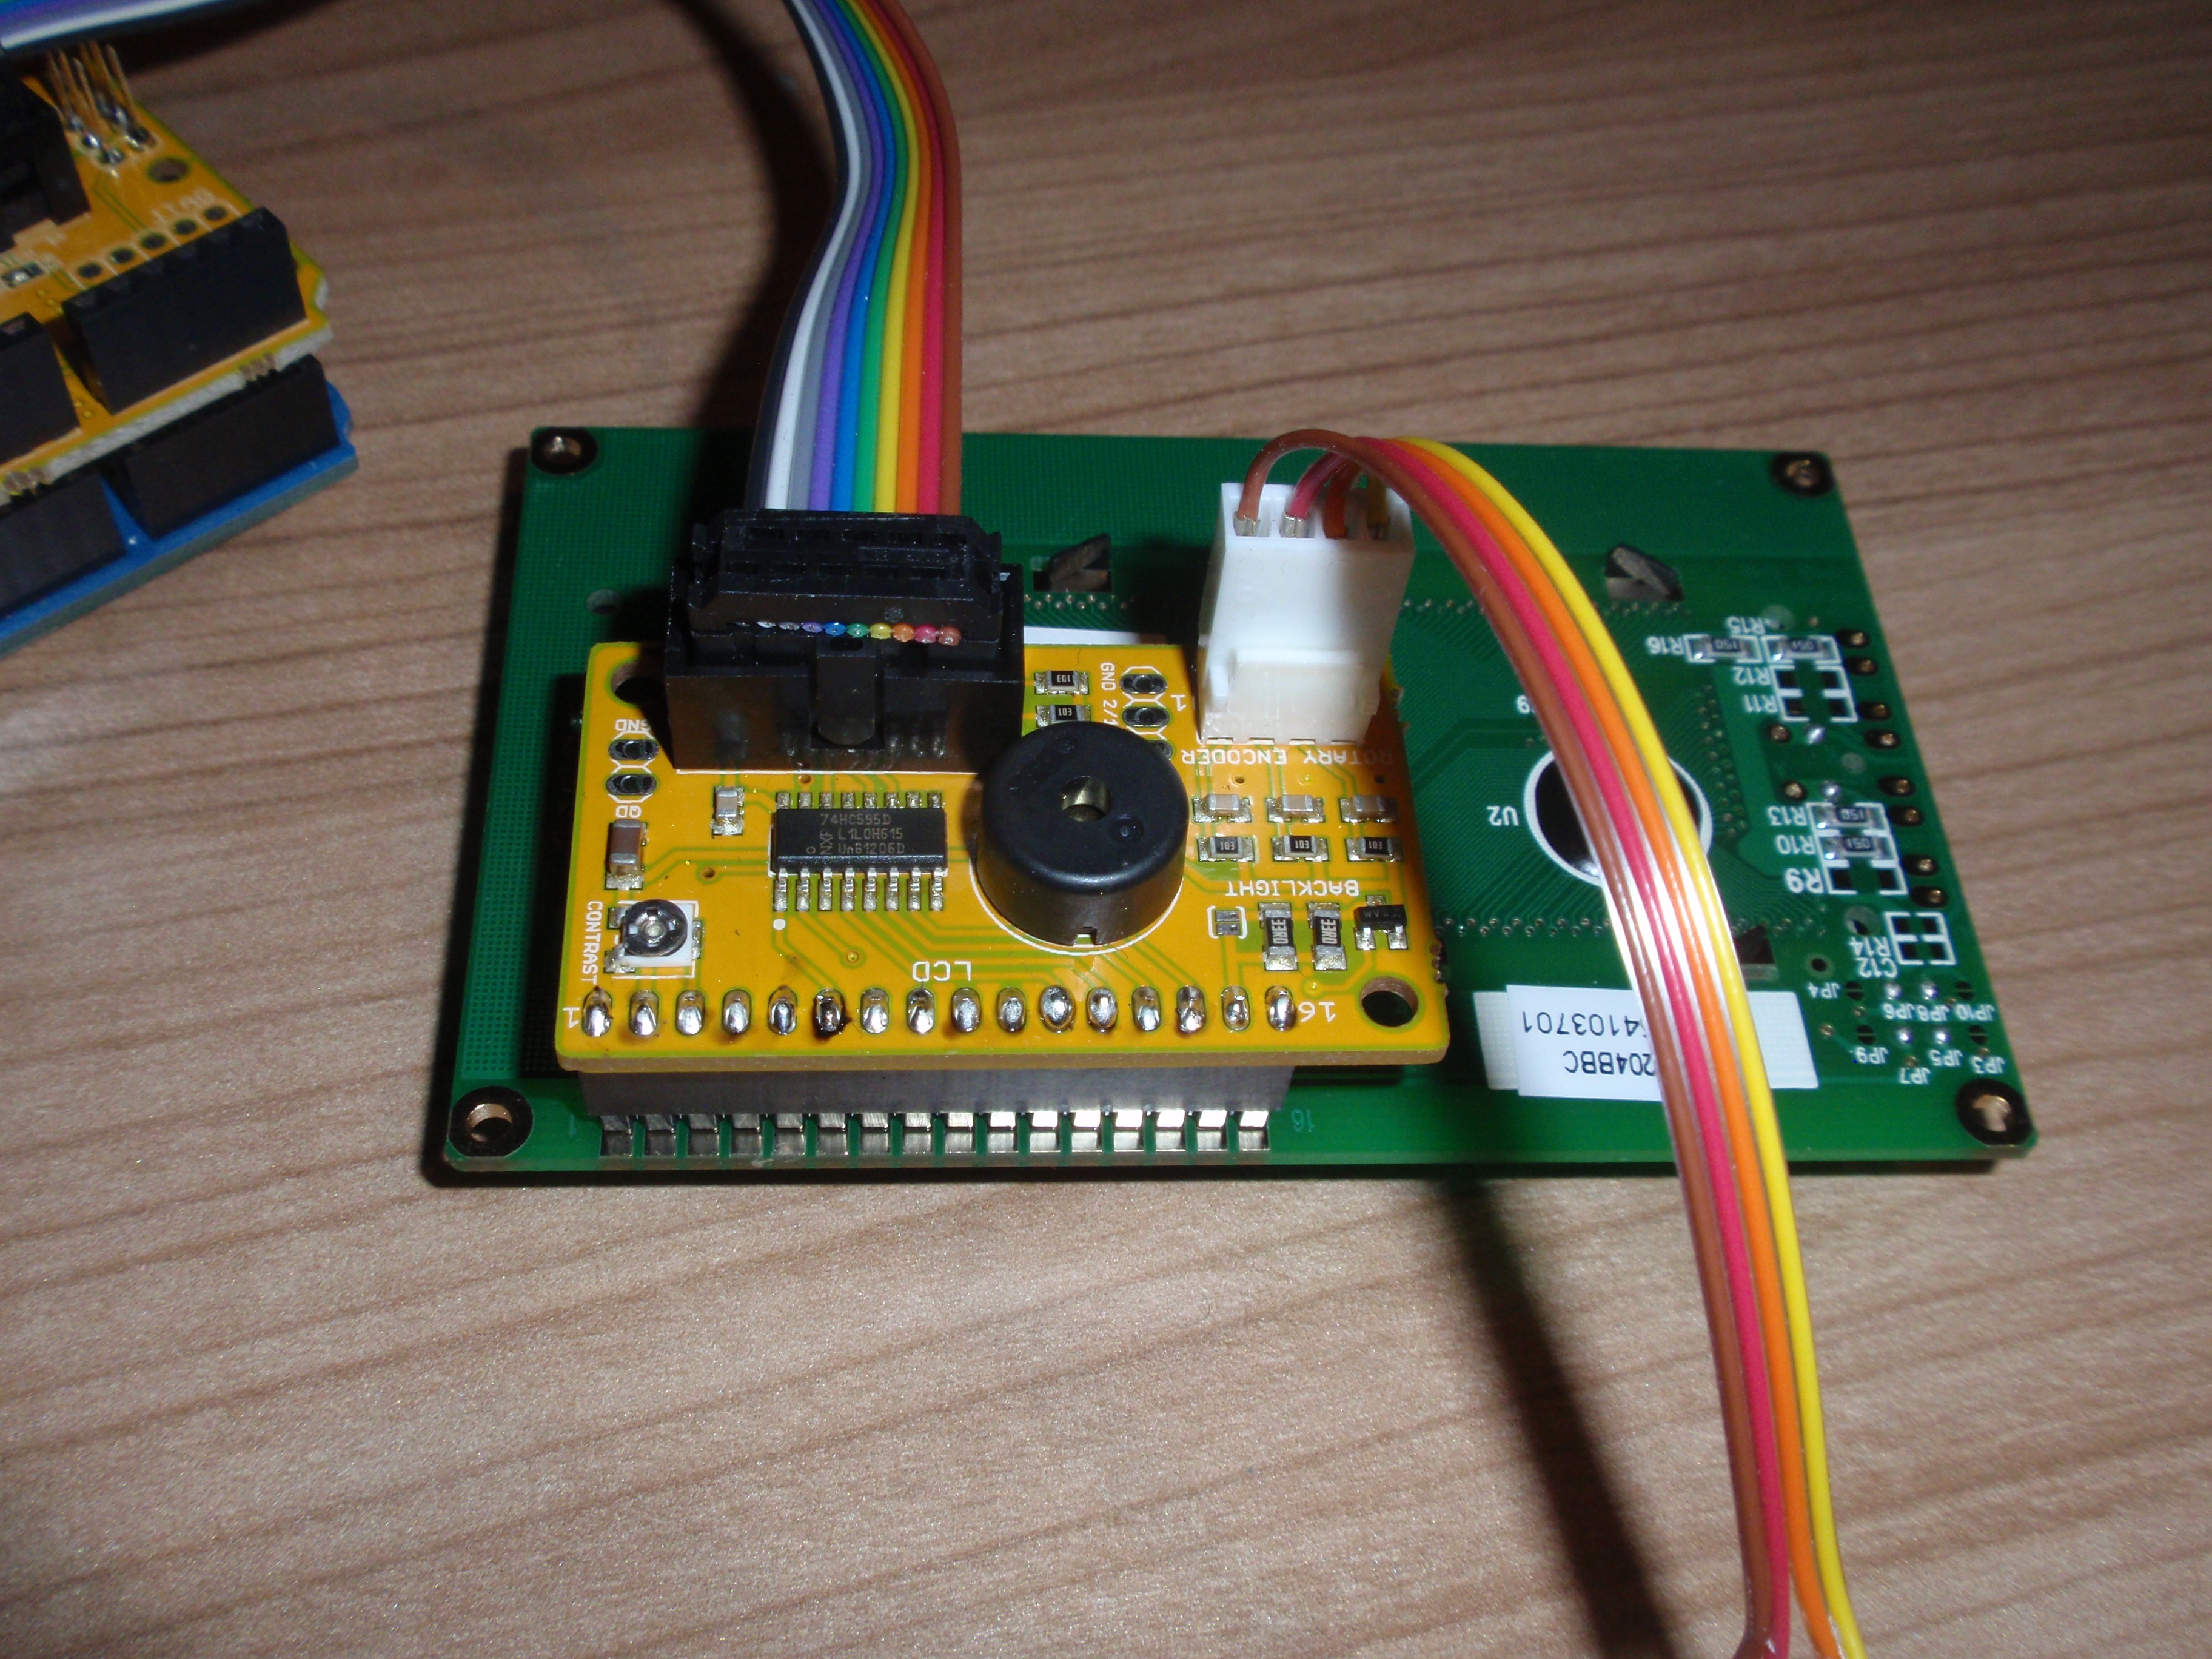
The LCD breakout board connects to the main board with a 10 pin IDC cable. The rotary encoder breakout board connects to the LCD board.
On the LCD board is a small potmeter to adjust the brightness and a beeper for alarms.
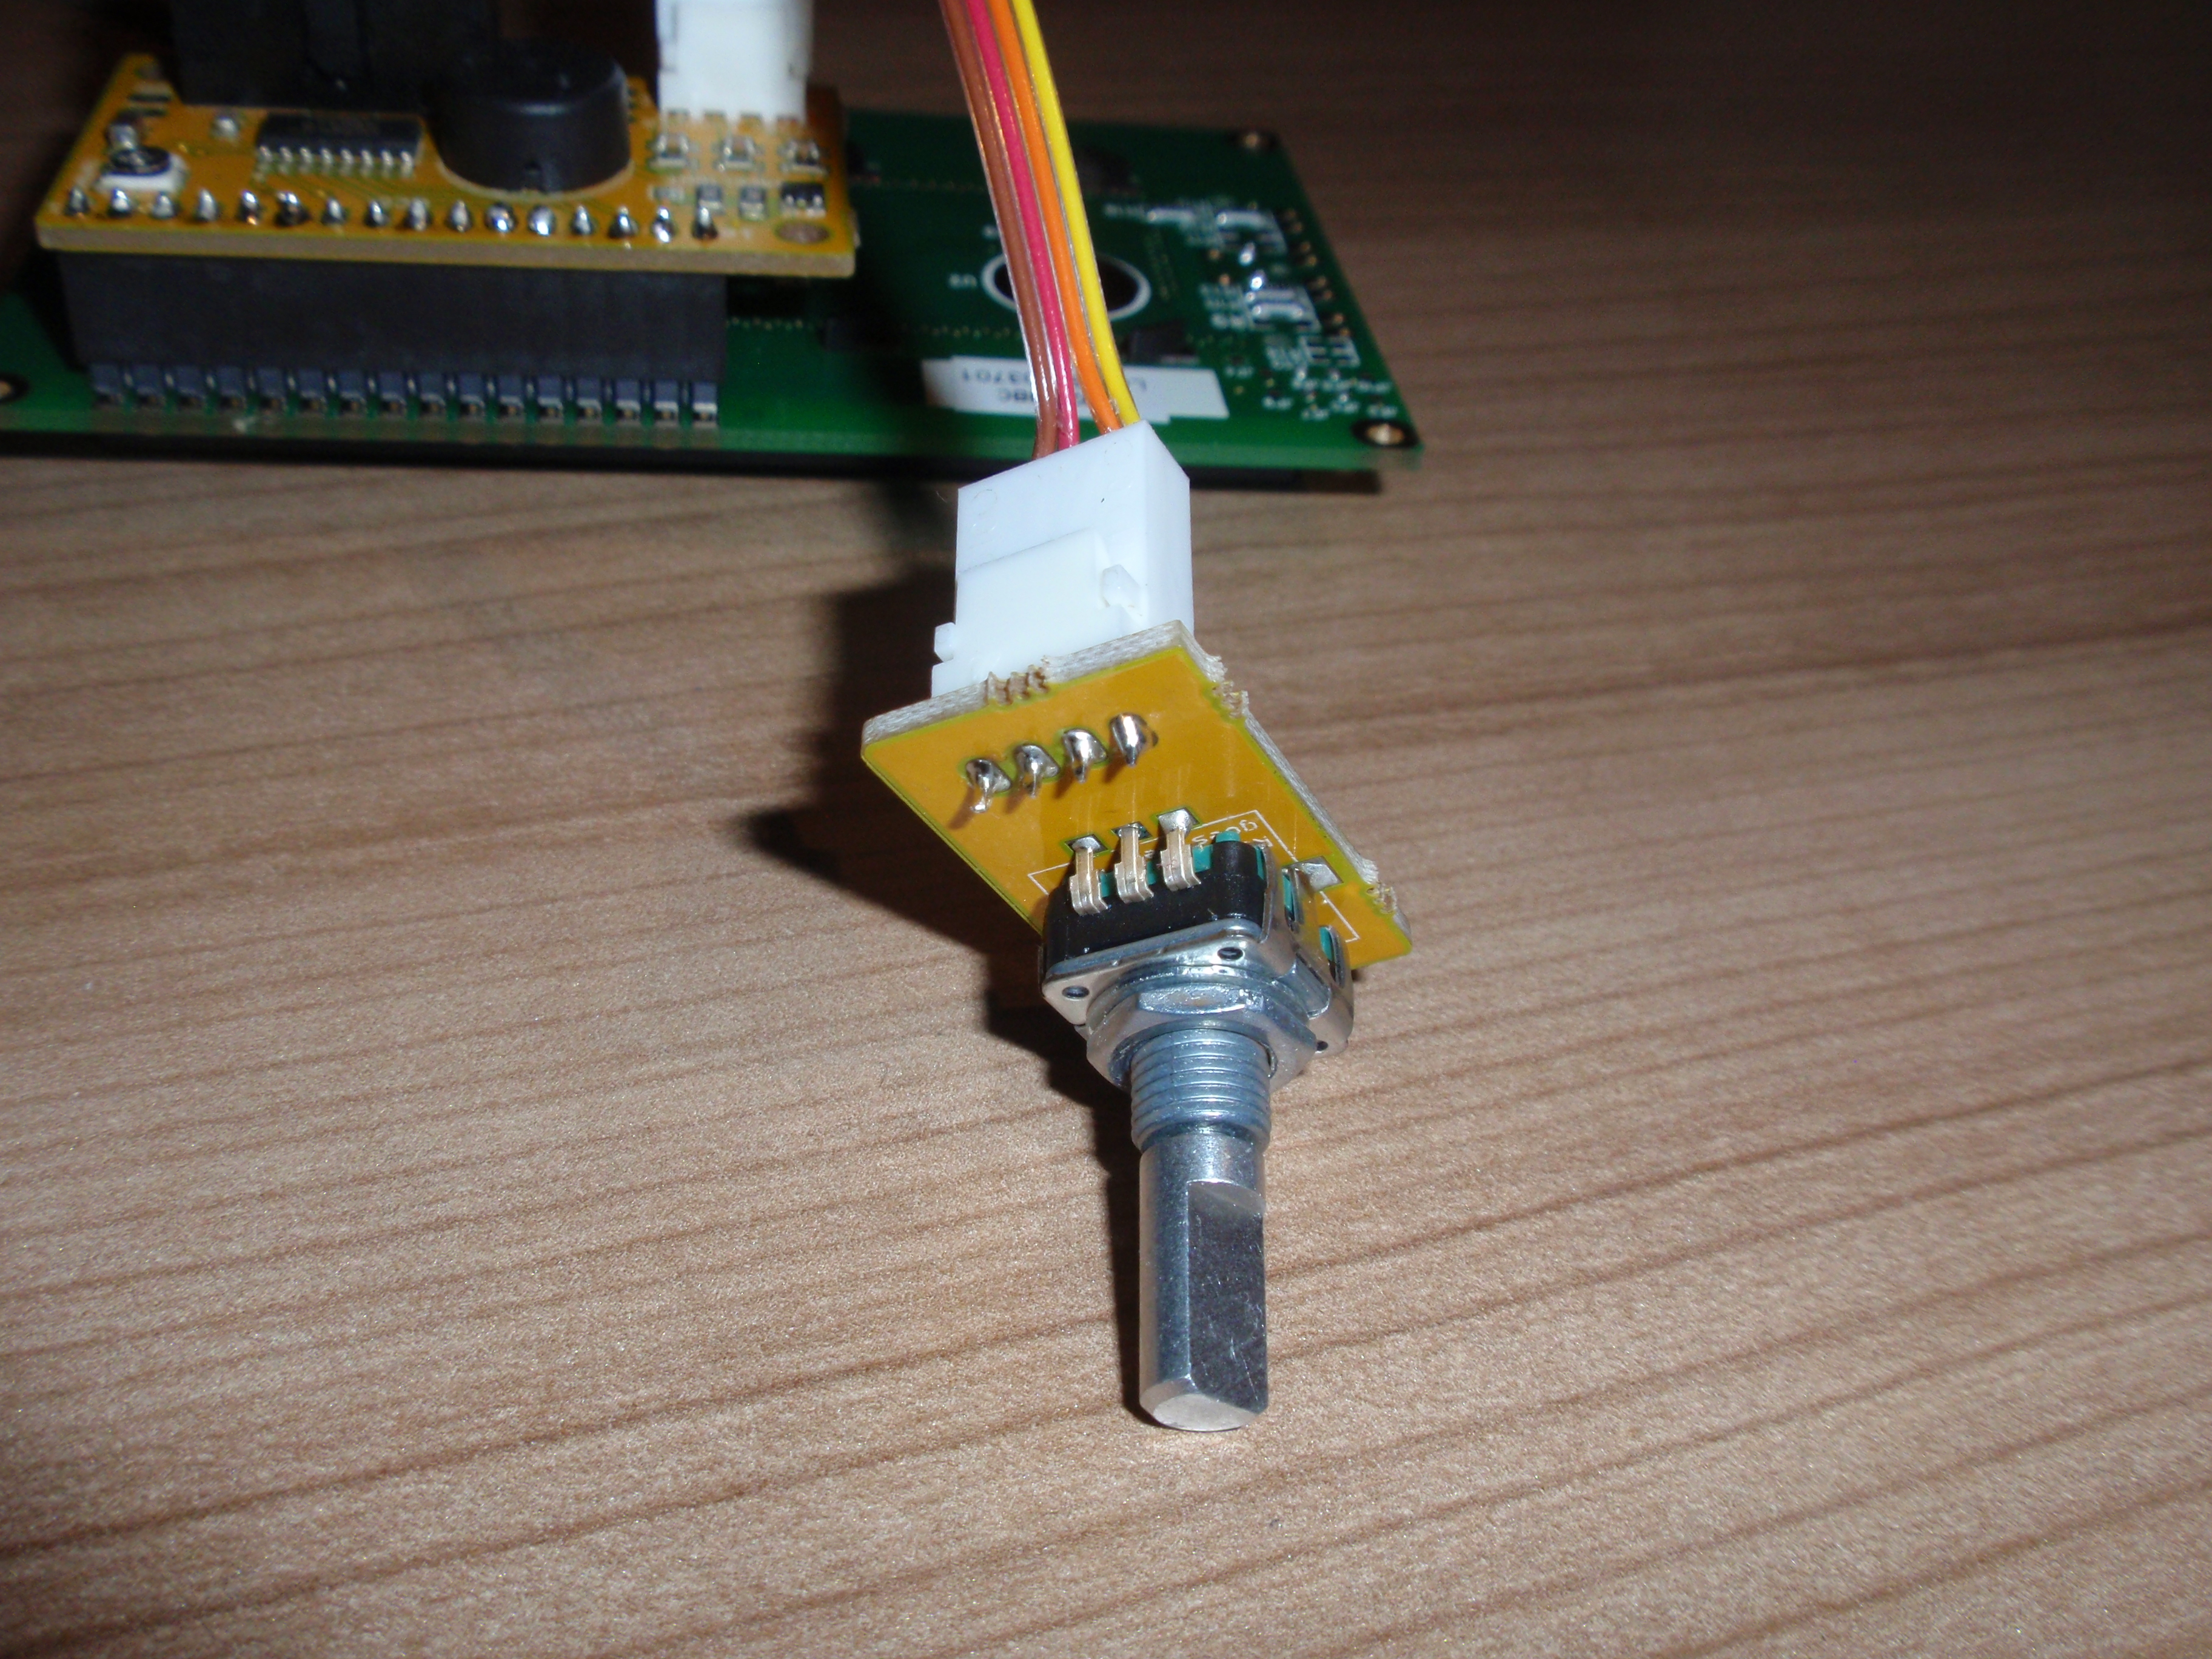
If anyone knows where to buy a nice affordable knob to go with this rotary encoder, please let me know.
I have used this knob so far, but it is really expensive.
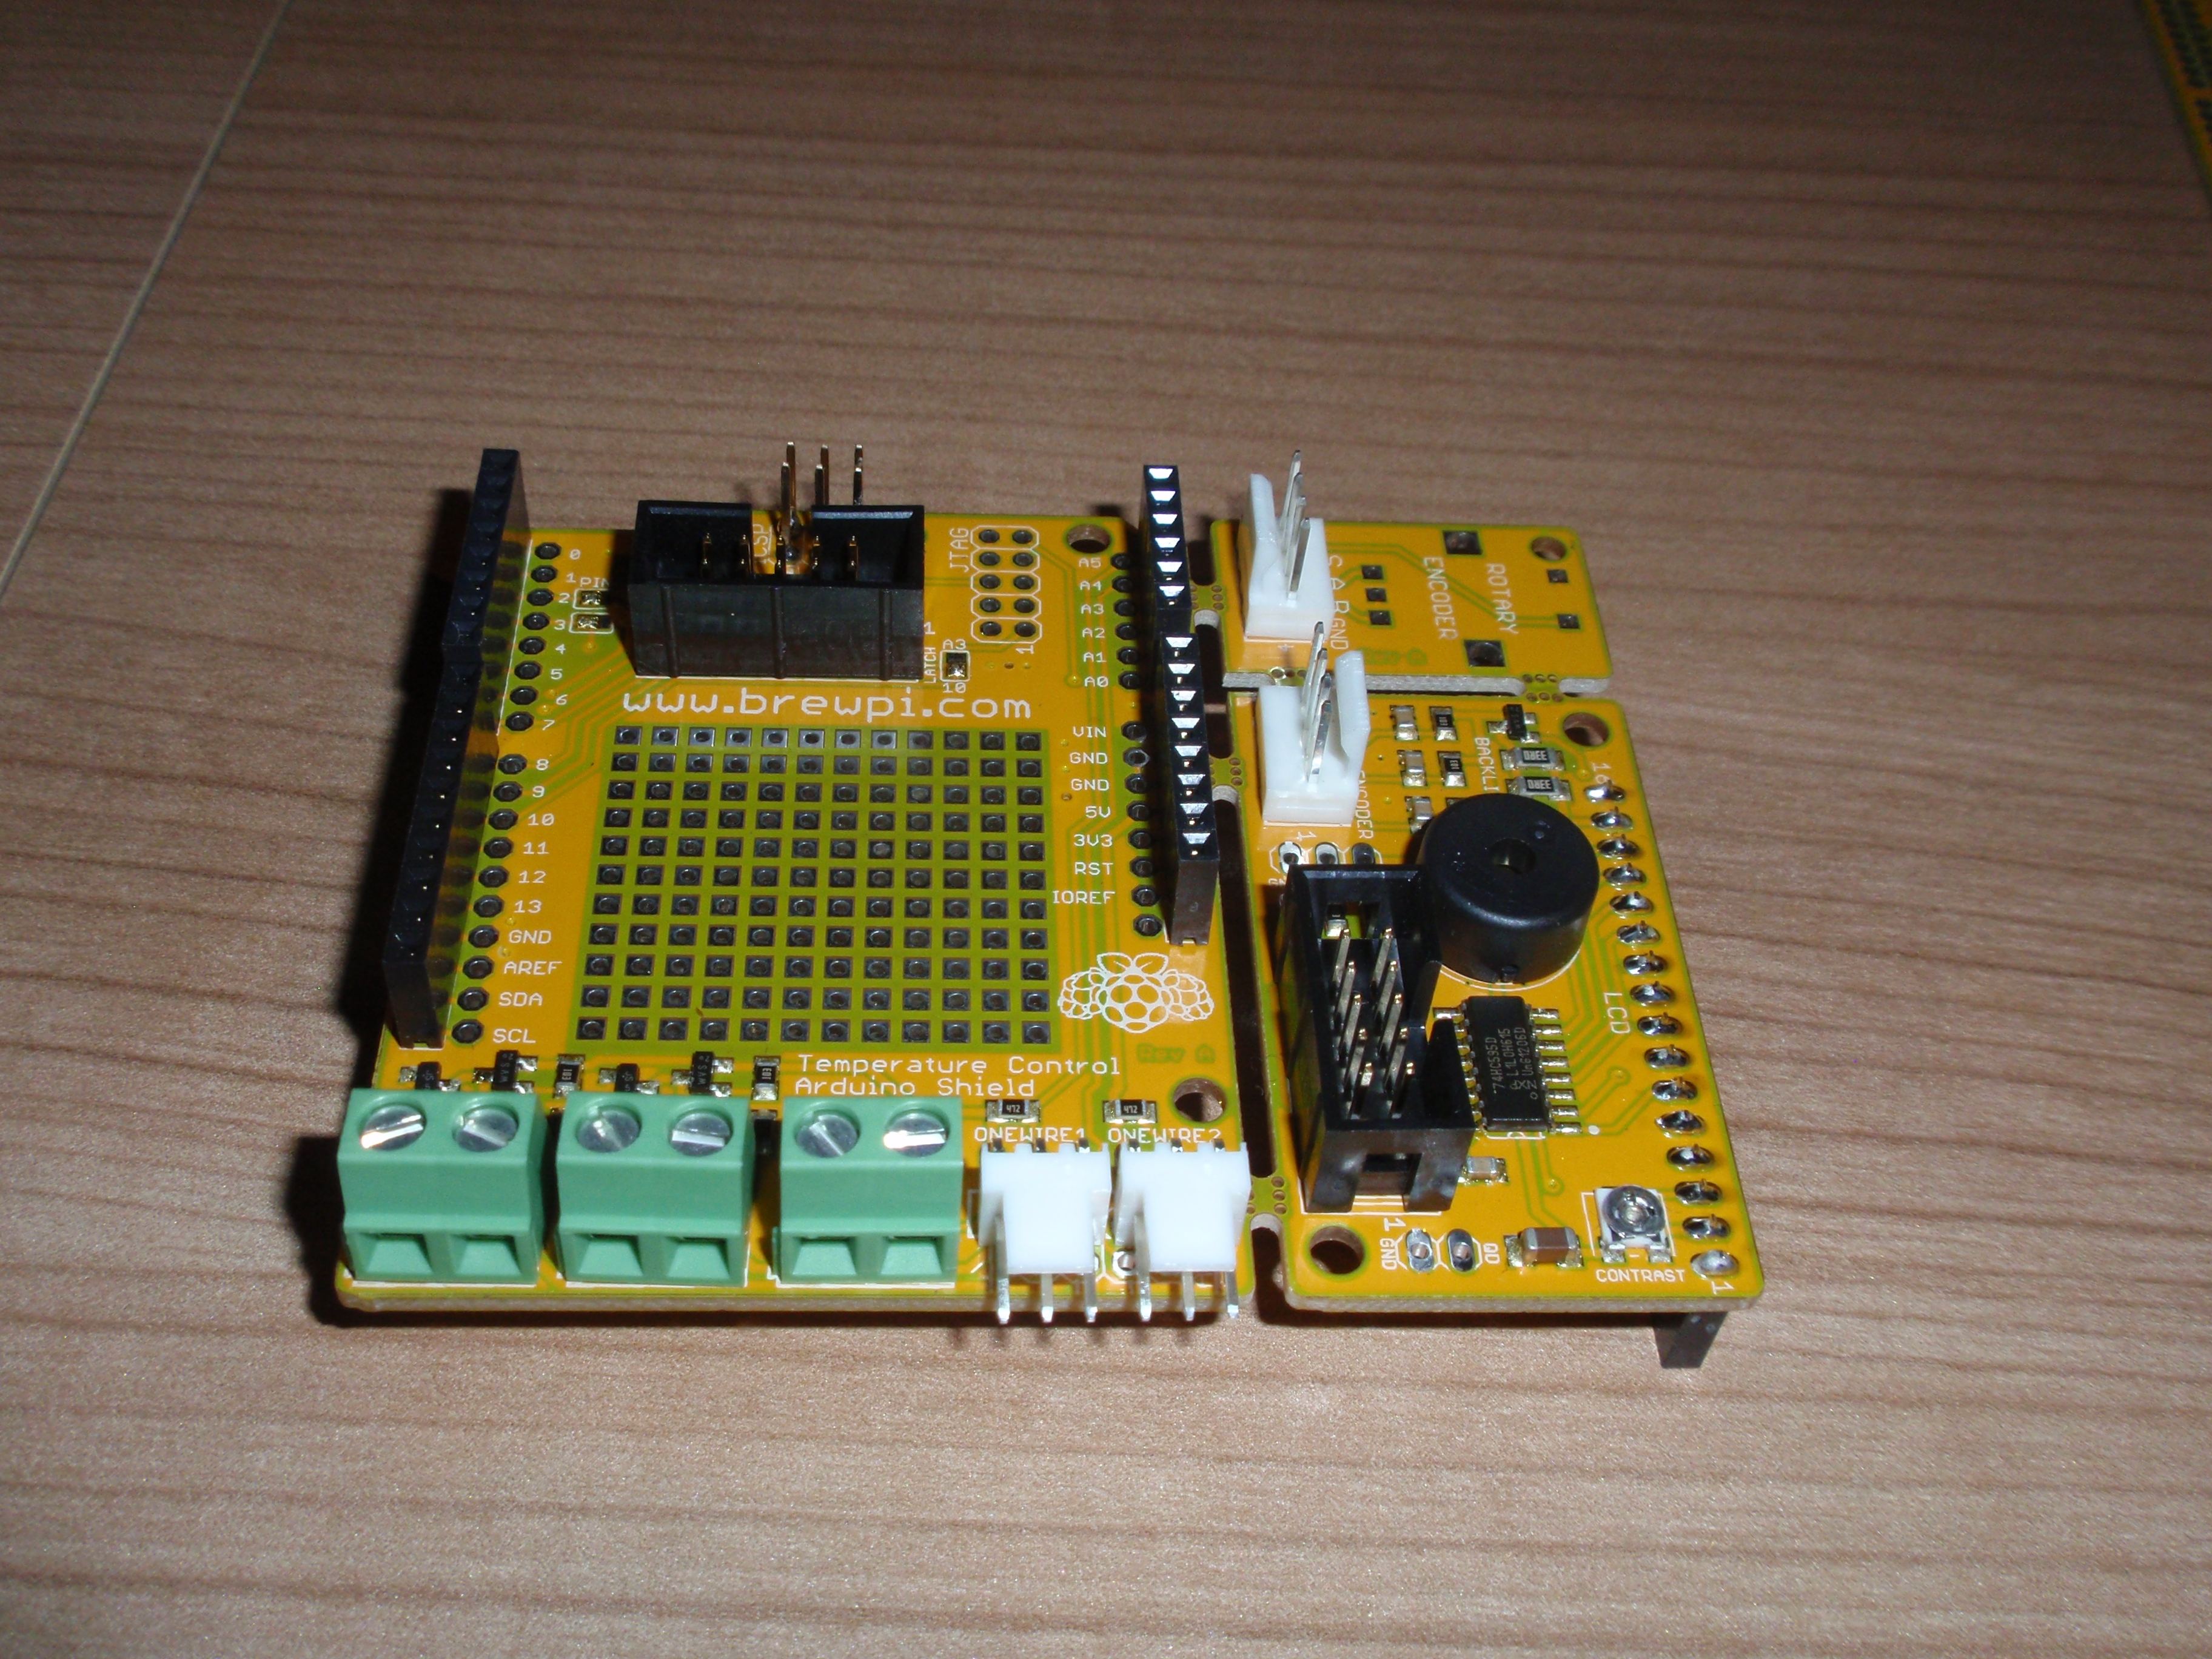
All through hole components placed, except for the rotary encoder
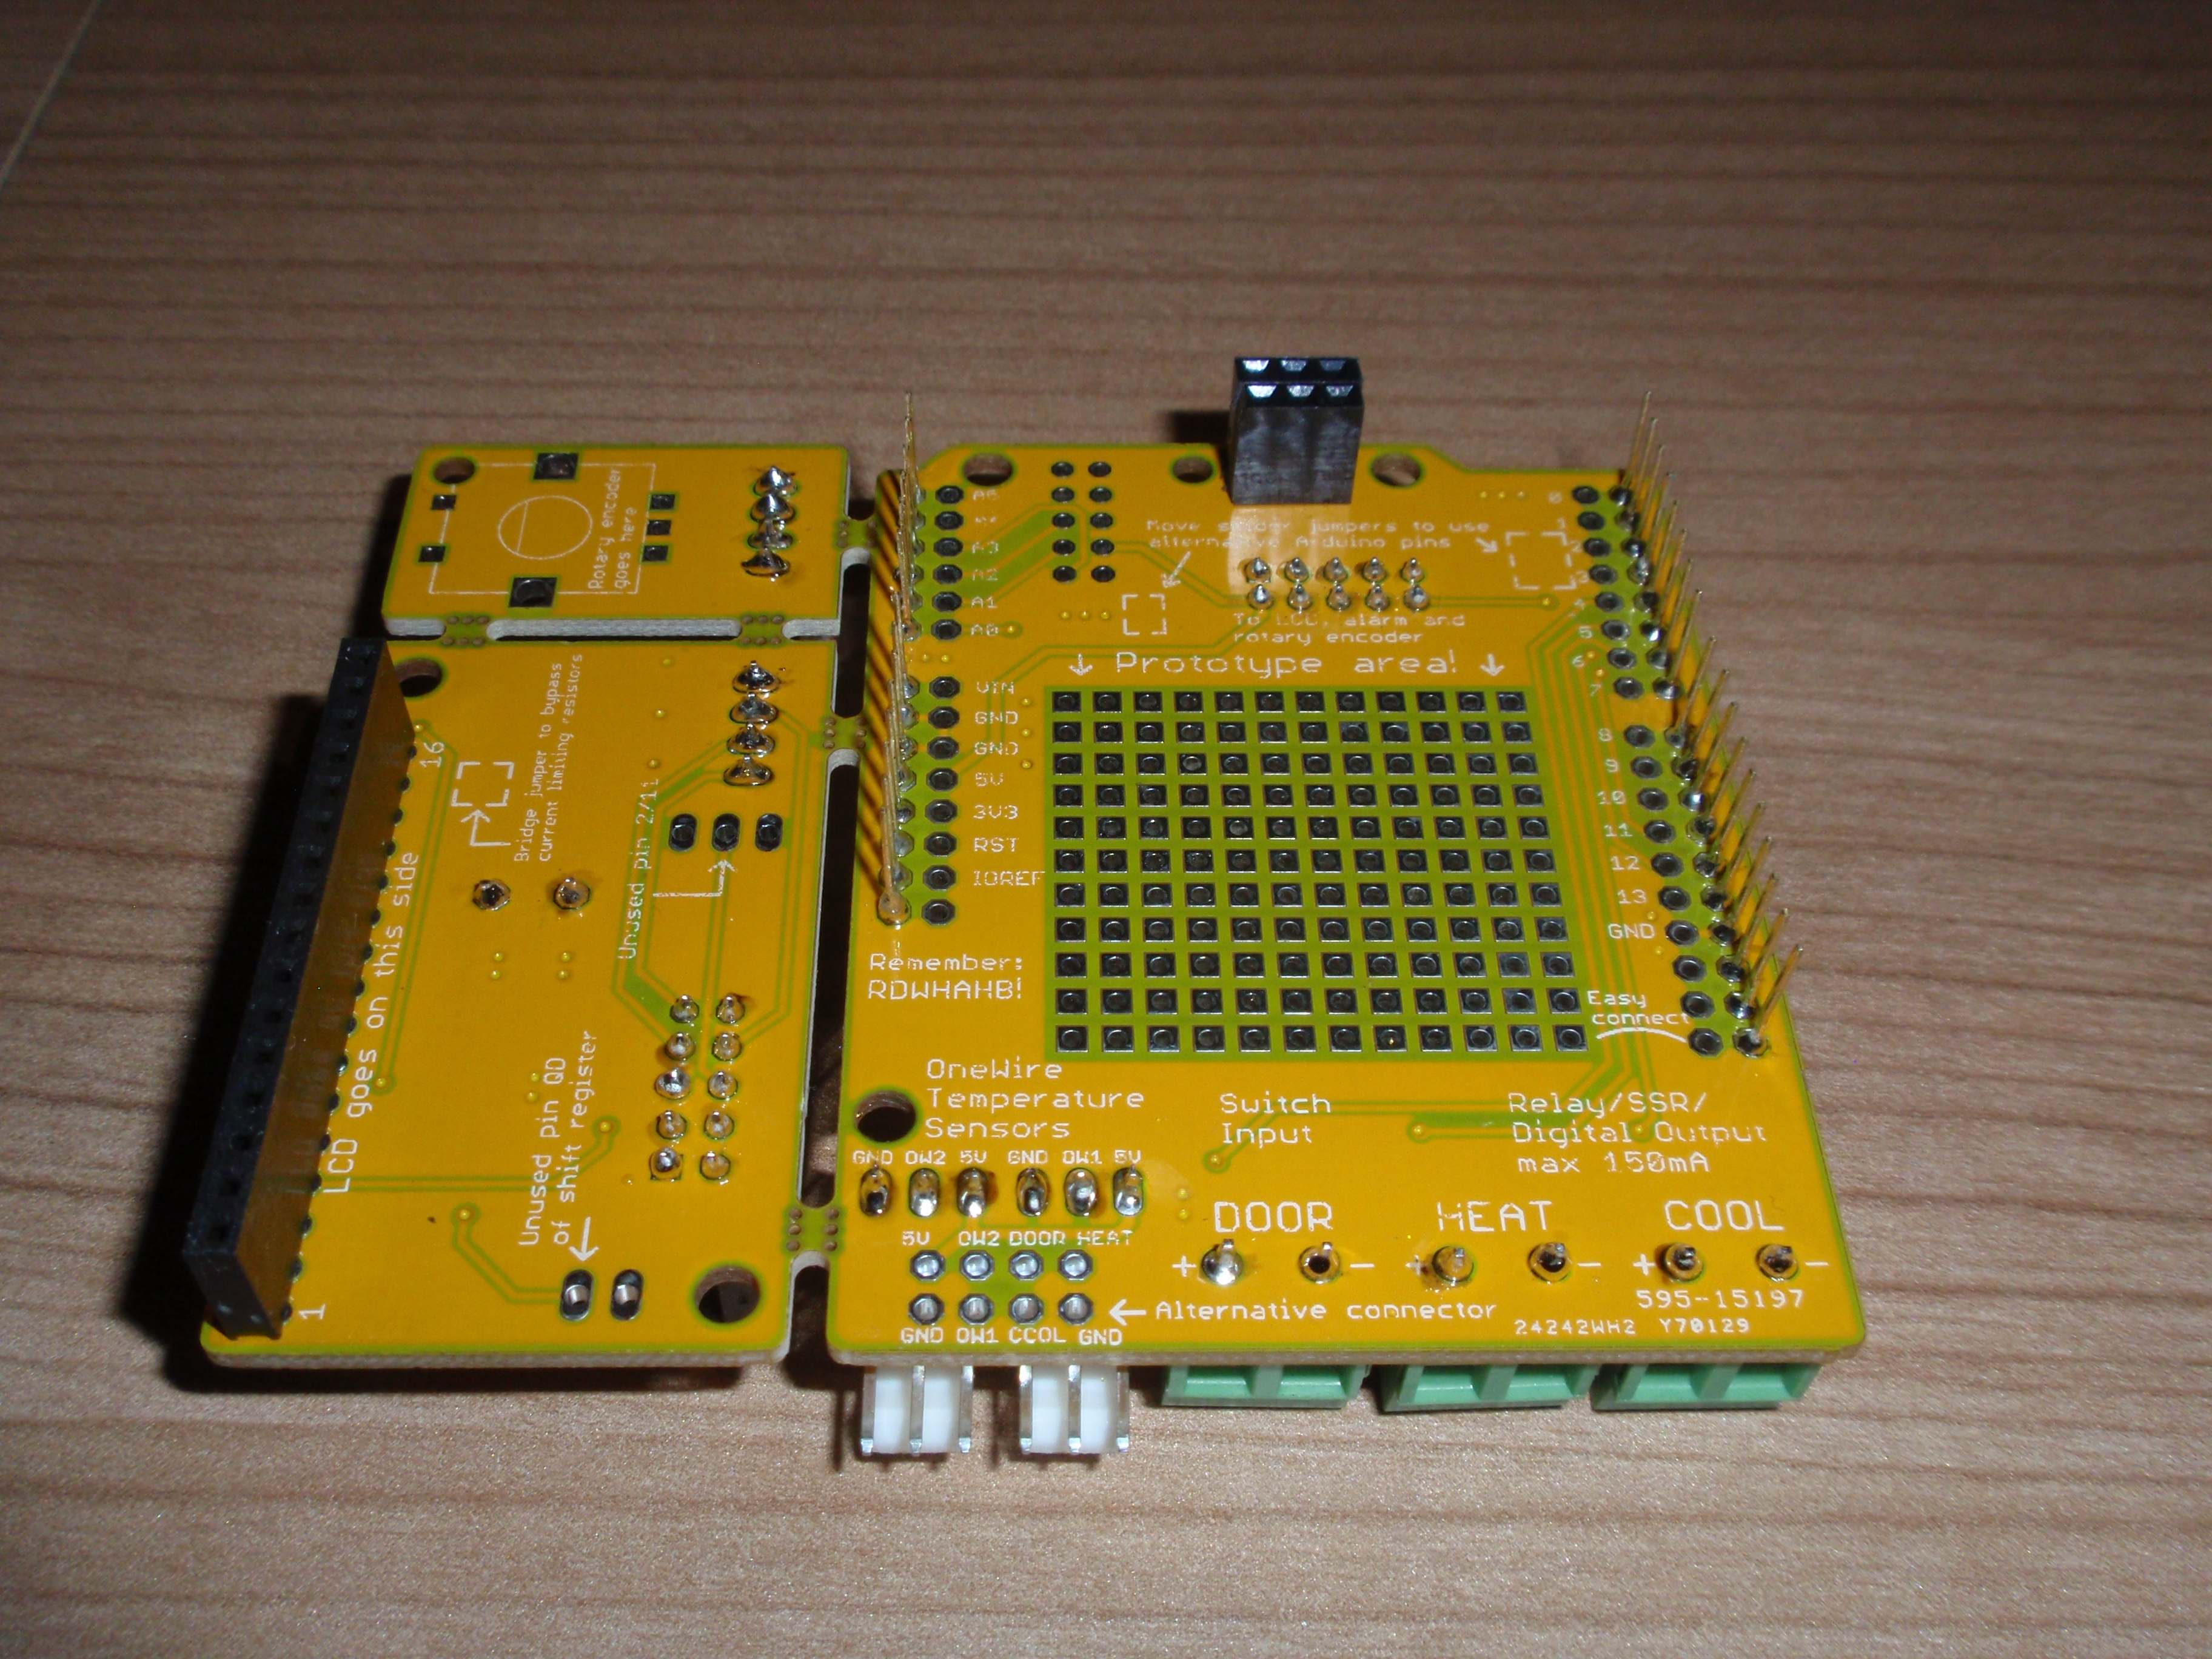
Underside of an assembled board. The stacking headers I used here have really thin leads, which bend to easily. I am looking for higher quality ones and ordered some samples from Samtec.
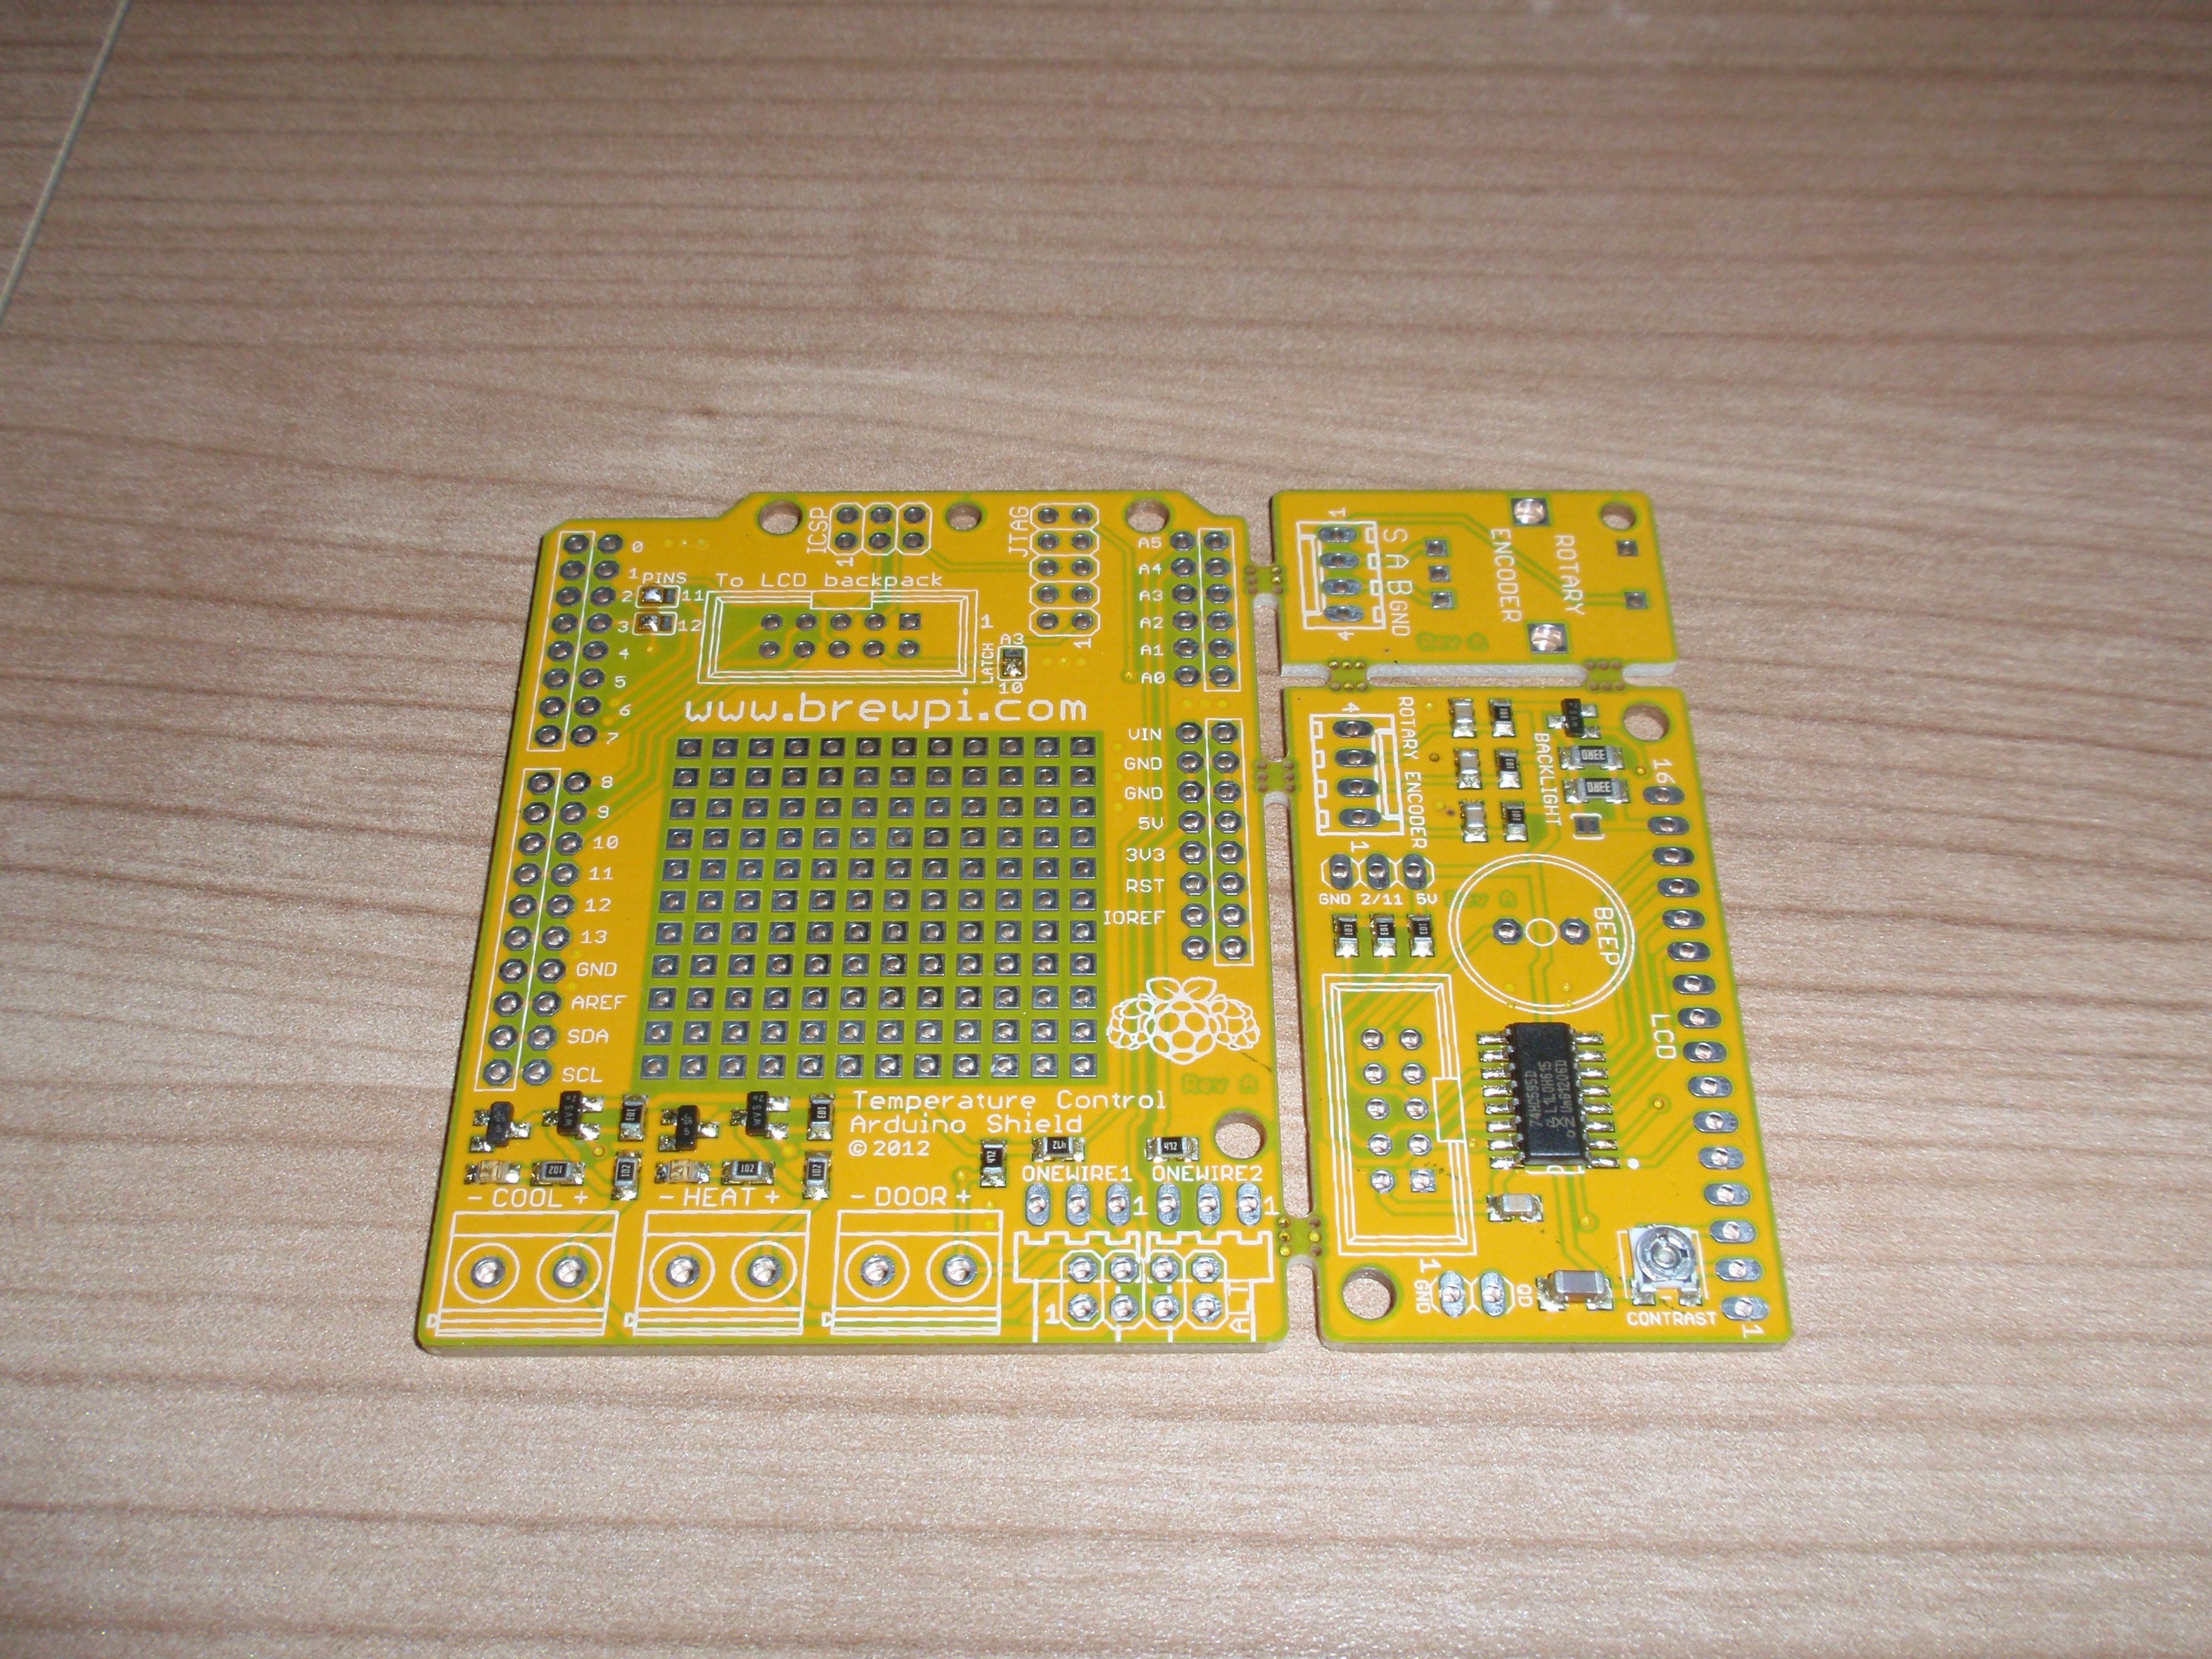
You can also order the board with only the SMT components assembled.
Try this for knobs in uk
http://www.suntekstore.co.uk/product-14004049-5pcs_plastic_potentiometer_control_knob_-_blue_and_grey.html
Thanks Ceejay.
I think those knobs are not really made for the type of shaft a rotary encoder has. The rotary encoder shaft has one flat side, so the kind of knob I am looking for has a small screw to fasten it. I could be wrong though, if these work there are plenty of options.
The knobs you used do work because of the set screw, but I think you are actually supposed to use a know that has the D shaped hole. I am not sure of the dimension of the D shaft on the encoder you are using, but something like this may work well: http://www.ebay.com/itm/40pc13mmx10mm-D-Shaft-6mm-Stereo-Audio-Rotary-Switch-Potentiometer-Aluminum-Knob-/290692265261?pt=Guitar_Accessories&hash=item43ae9bf52d
Nice! those look good.
Ebay carries some nice clone nobs, I use them for guitar pedals.
http://bit.ly/USof0O
Hi, just wondering, are you planning to sell the boards? Or an entire set including / excluding the arduino? Because I am considering ordering some stuff at the moment?
Both options will be available, but for now the Arduino will be excluded. Board + temp sensors + relays + display.
Look forward to seeing the final product compiled!! I know your still sourcing parts and such.. but any idea of ballpark price??
I don’t want to make promises I can’t keep, so I will only announce the price when I am done sourcing parts.
If you are planning on buying anything electronic in bulk I would only shop at digikey.com, they have the best prices and basically have everything, including your original knob (and many others just like it) at better prices.
Last time I checked prices were better at mouser. I have bought most of the more expensive parts from China.