The BrewPi shop is open for business!
Hi Guys!
I am proud to announce that the BrewPi shop is open to take your orders! Unfortunately stock is limited for two reasons:
- This was the first time I ordered most of the parts, so I did not want to order much more than 100 of each.
- China is on holiday! The timing of my product launch is a bit unfortunate. I cannot order more parts because all factories are closed. I worked my ass off before I went to Monkigras to order the stock I have now, just before all factories closed. More details on Monkigras later, when the video of my talk is released.
If the shields/parts sell out, they will automatically switch to pre-order. I will order a new batch as soon as China opens for business again, but I probably cannot ship anything before the end of February.
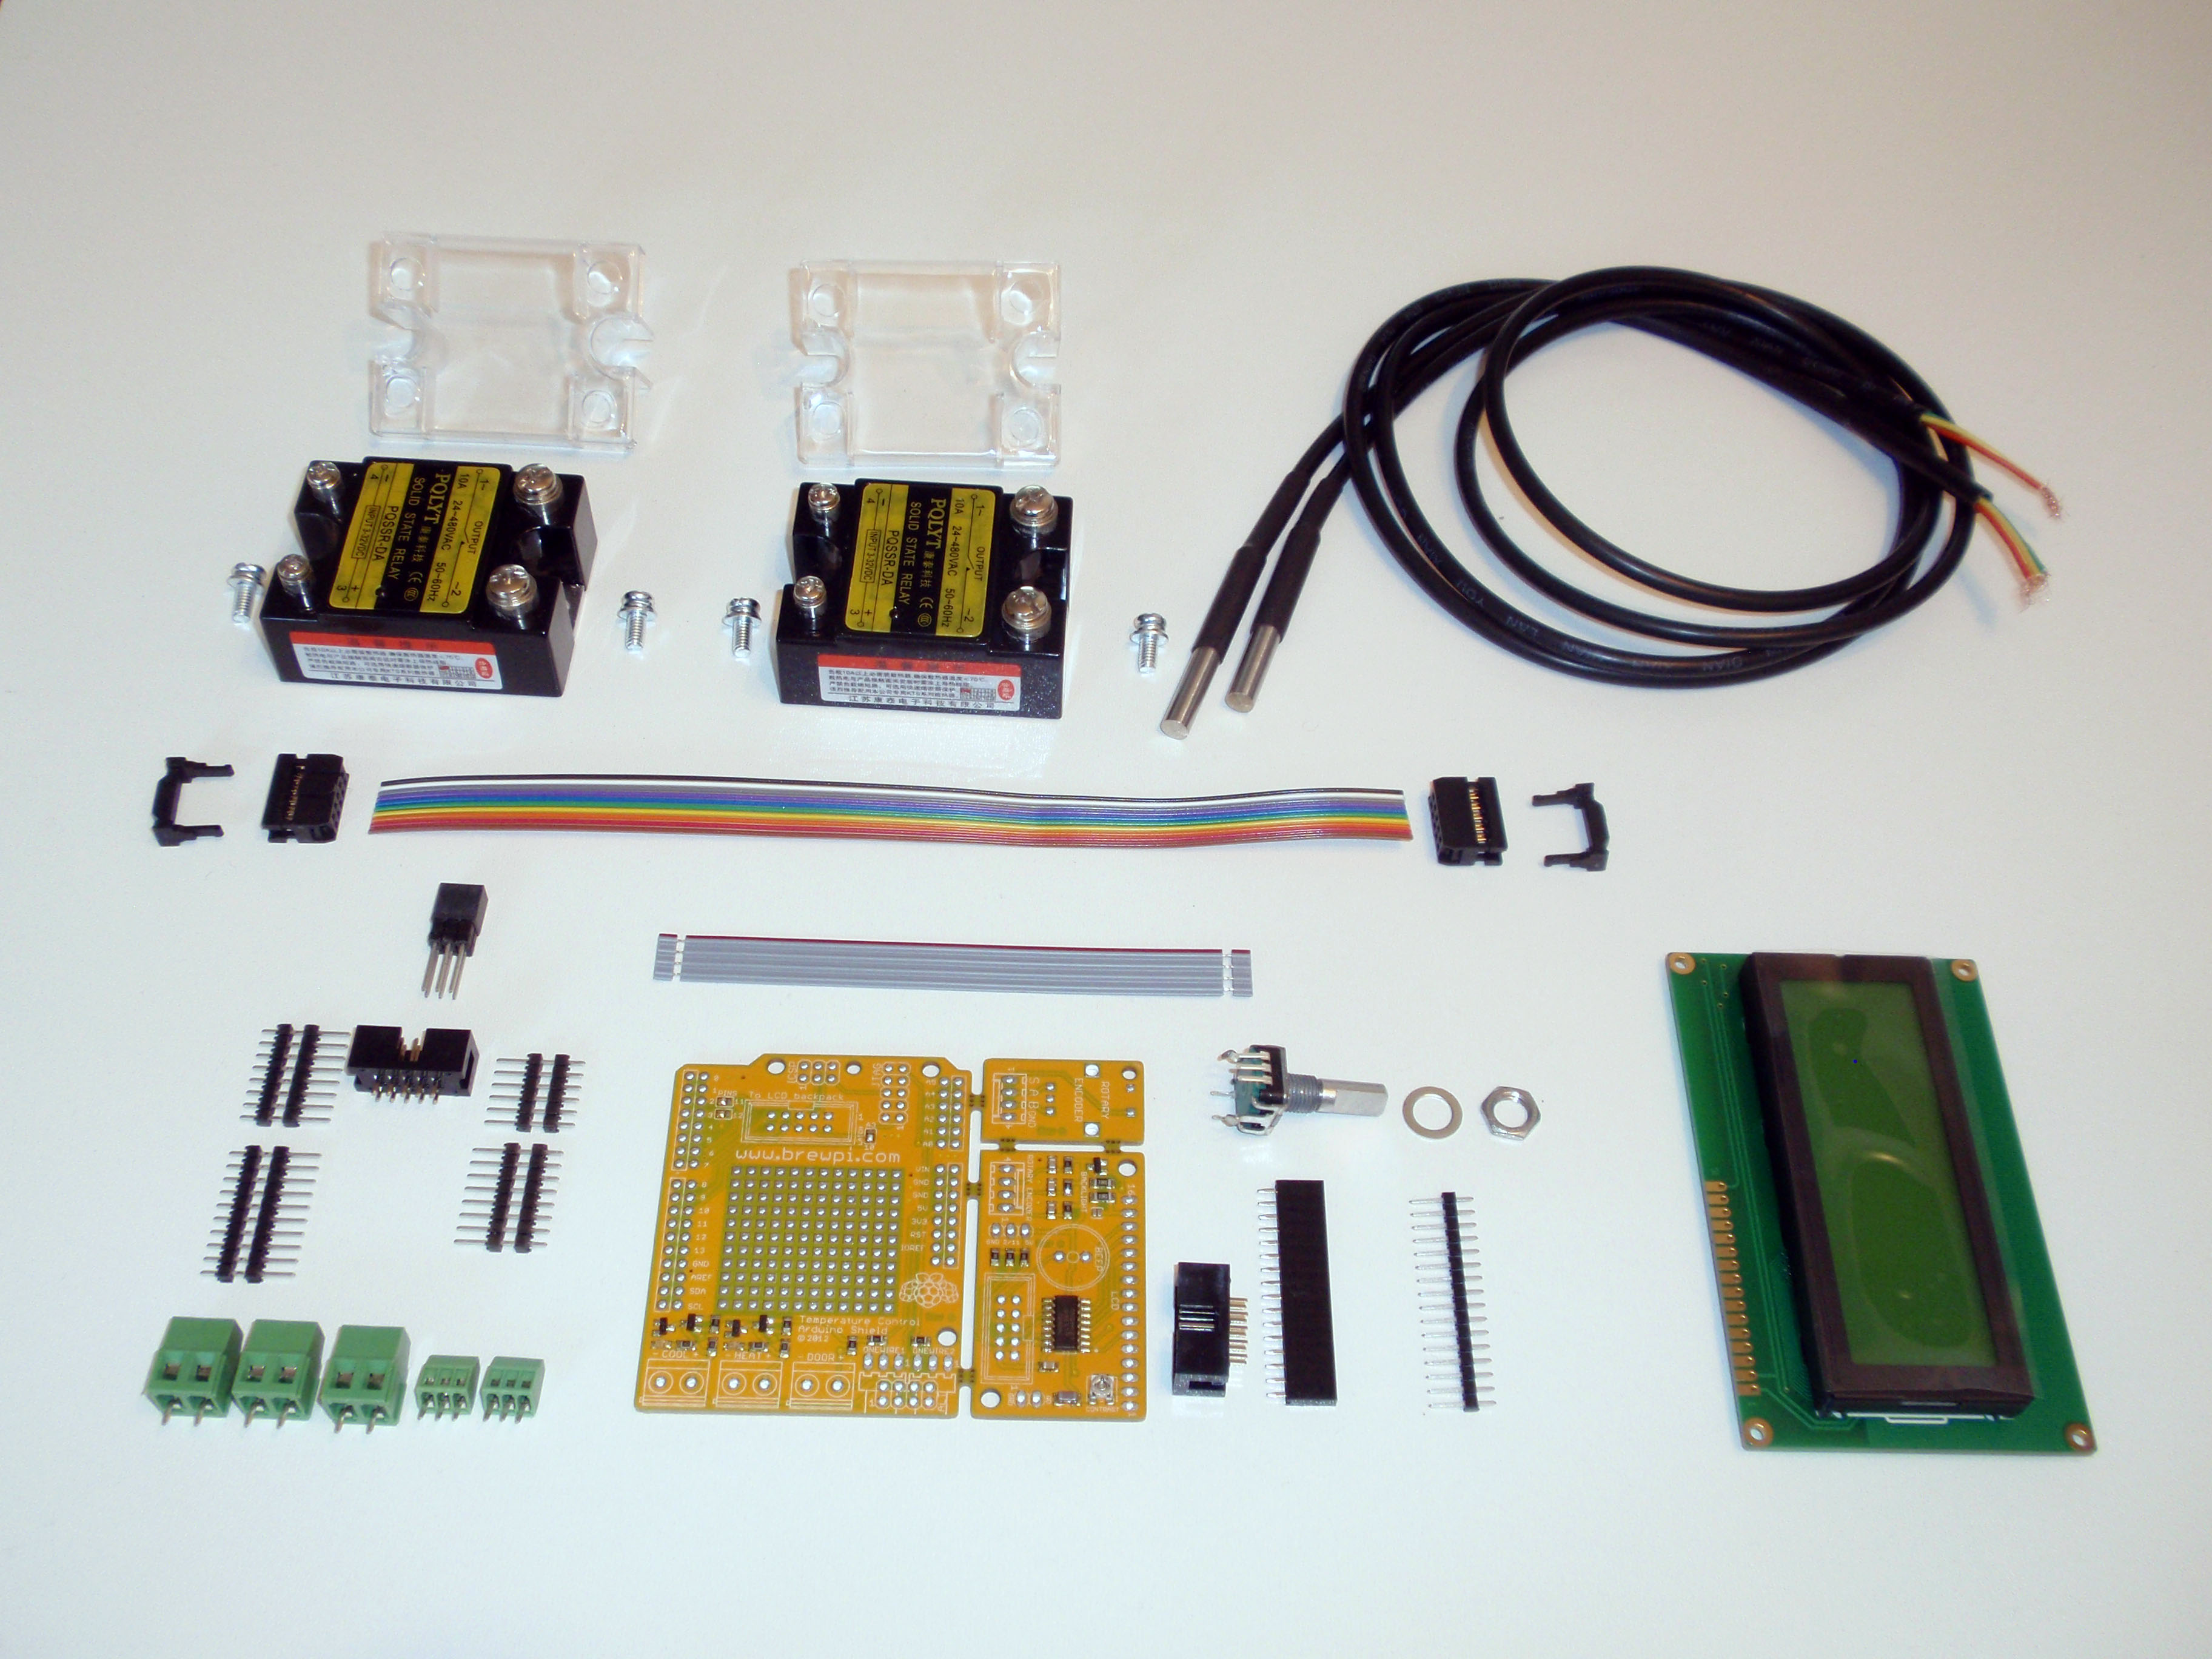
You can buy all these parts in one go, but if you already have some components, you can also order them separately.
By default SMD is soldered and you will solder the connectors yourself. If you want me to solder them for you, you can choose that option in the shop. There is a check box on the shield product page for that.

An assembled shield will look like this.
More info about new design choices after the break.
New design choices
I have made some changes to the parts you have seen in earlier pictures, here is an overview:
Bye, bye Molex KK headers
The Molex KK headers are great once you have assembled them, but assembling a cable is a bitch. You will need a special crimp tool and it is a lot of work. Therefore I have chosen to replace the Molex headers for the temperature sensors with mini screw terminals. You will need a very tiny screw driver, but apart from that they are easy to work with.
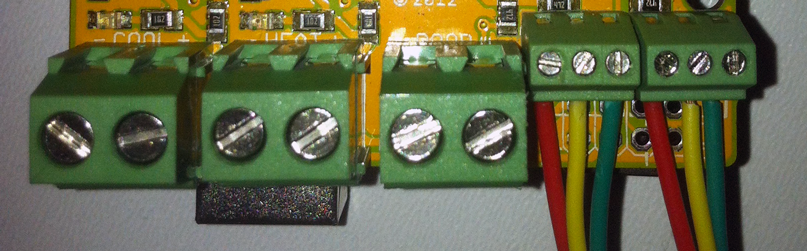
Molex KK headers have been replaced by screw terminals!
I have also omitted the 4-pin Molex headers for the rotary encoder and included a 0.1 inch pitch jumper cable you can solder onto the boards correctly. I could not think a reason to take the boards apart after assembly, so why not just solder them together.
New Arduino Headers
Most Arduino shields ship with stacking headers, so that was my original idea as well. But for several reasons, I have opted to use non-stacking headers instead:
- There is a large prototyping area on the board itself
- There is an additional, unpopulated header row next to the original headers. You can use these rows to make your own daughter shields.
- The LCD connector will be in the way of most Arduino shields anyway
- Non-stacking connectors are cheaper
The fact that these connectors are cheaper, doesn’t mean they aren’t very, very nice. They are very high quality from Samtec, which makes great connectors to order. I have chosen male headers with 0.3 inch extra elevation. This results in a nice clearance between the shield and the Arduino Uno USB connector. For the ISP header, I use a 2×3 elevated stacking connector, so you can still connect programmers and can use the SPI port on the Leonardo.
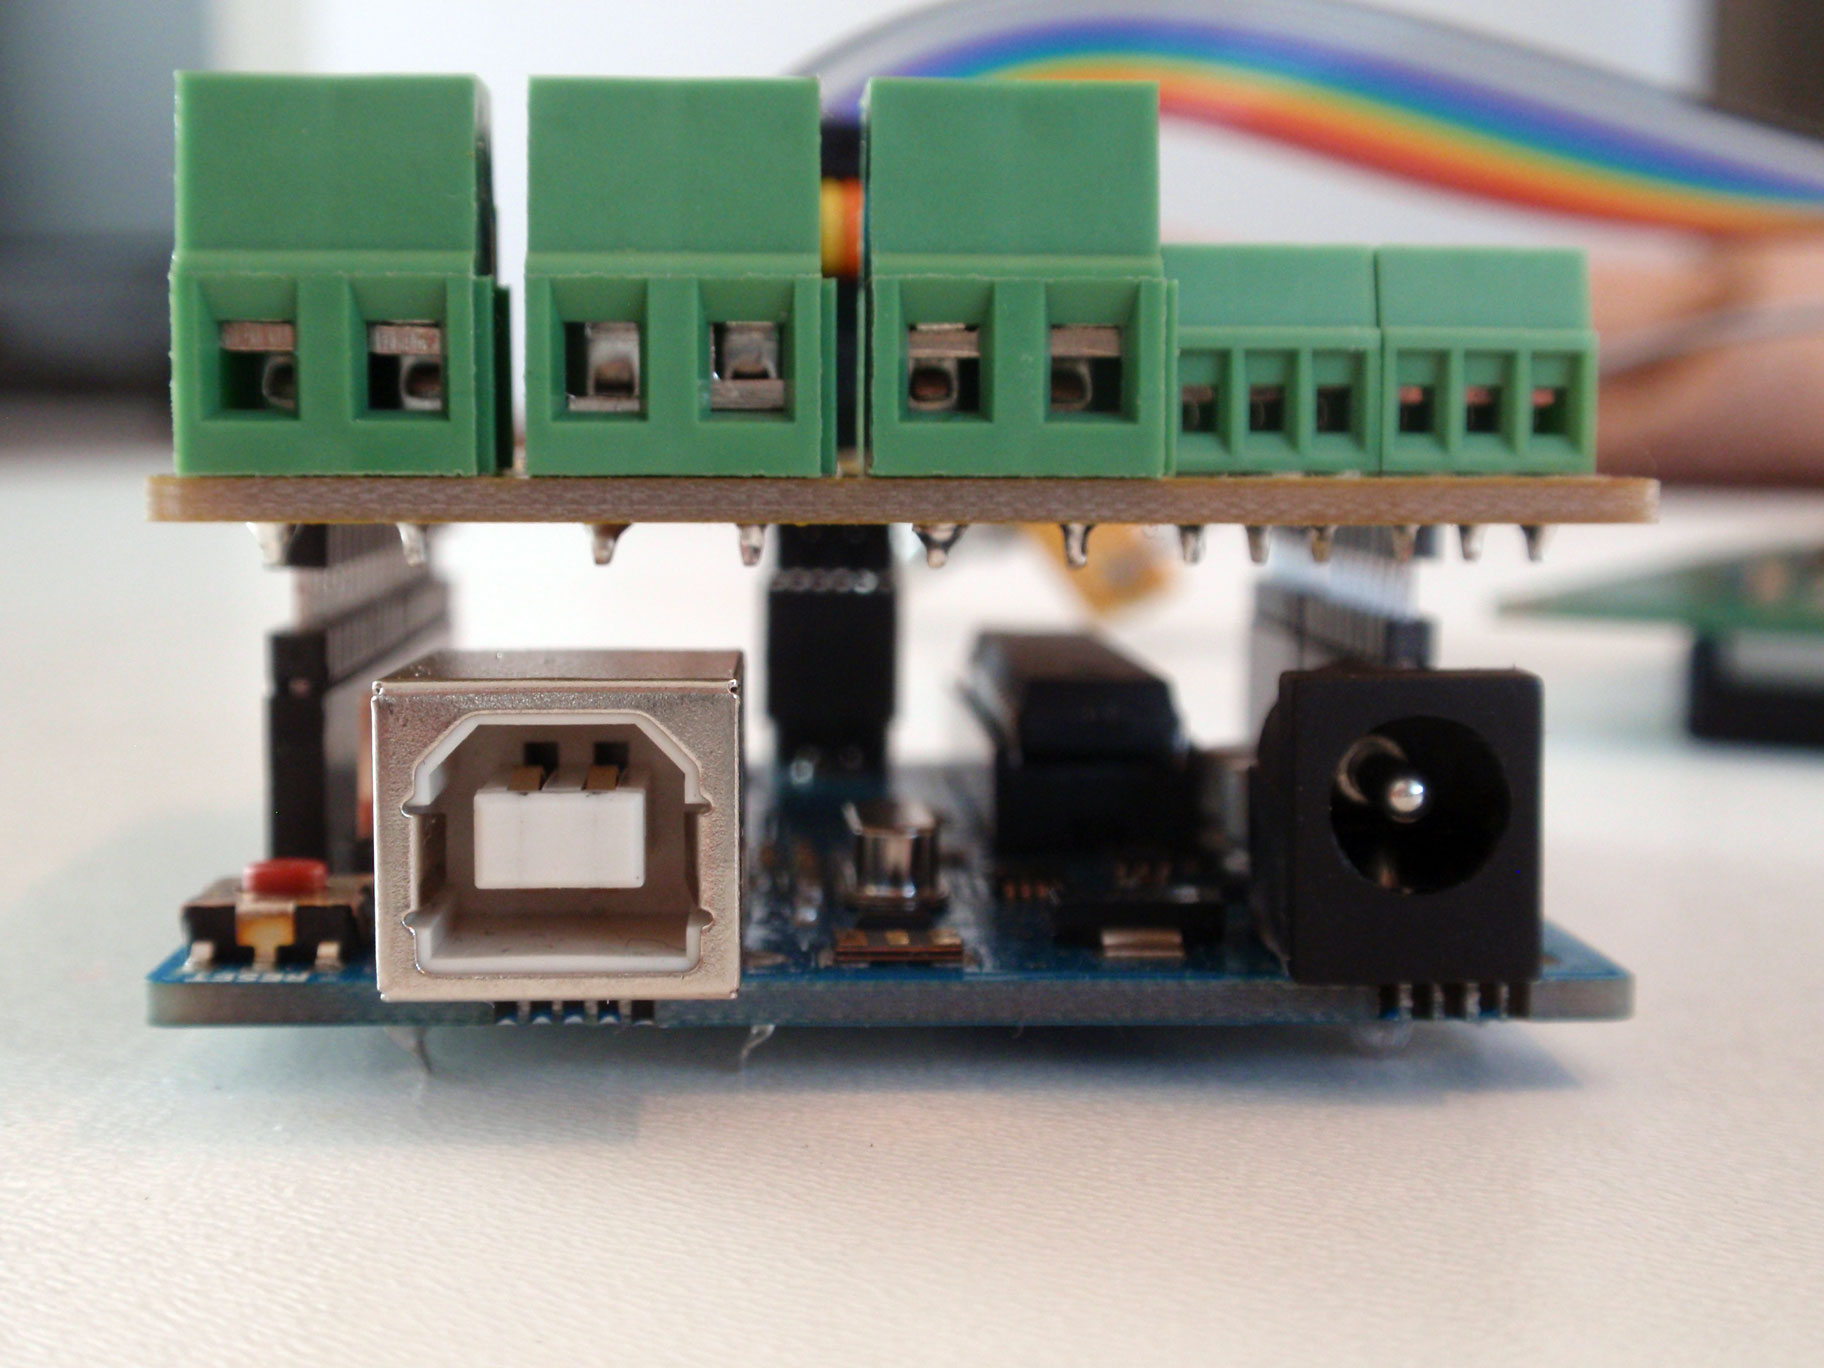
The elevated headers prevent problems with the high USB connector on the Arduino Uno

The shield ships with these extra elevated male headers
LCD instead of OLED
For most people a normal LCD was good enough, so I decided to sell those instead of the more expensive OLED displays. The displays are very easy to read though, great quality.
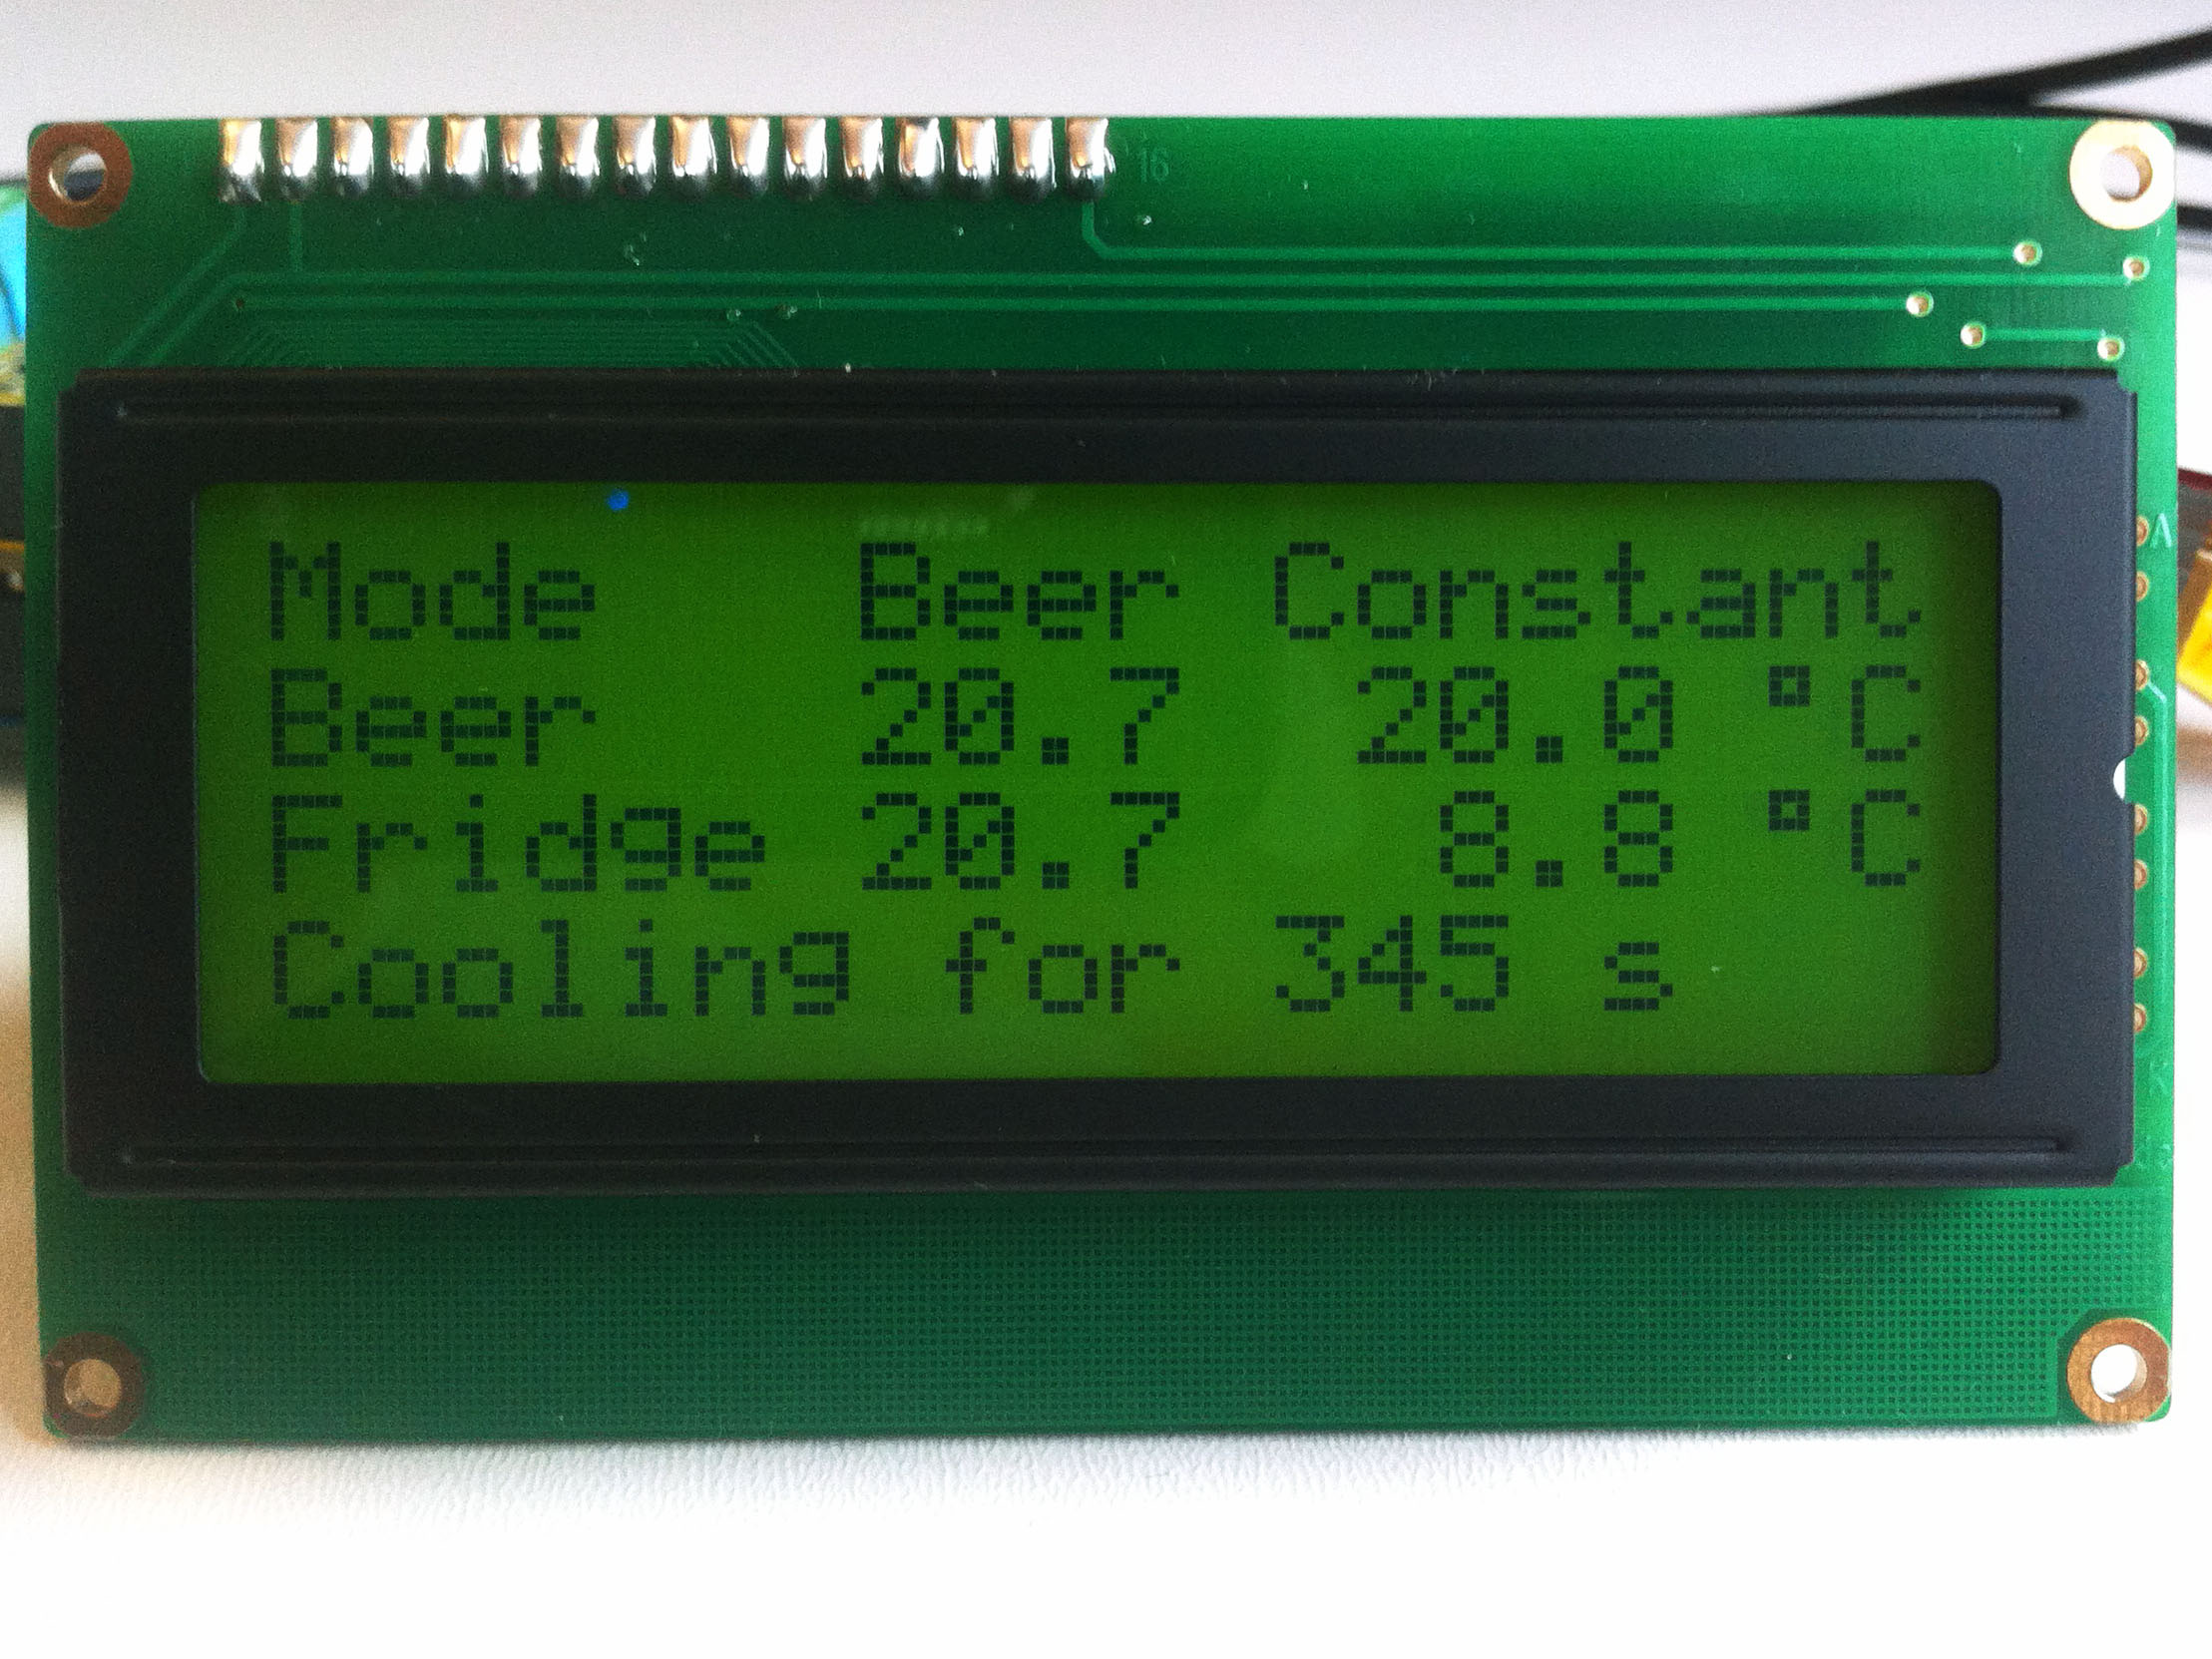
The LCD from the BrewPi shop: default black on green. If you noticed that the picture quality sucks: yeah, I dropped my camera from my desk. Fell right on the lens. Also, last week I dropped my Nexus 4 in London, right on the glass. Bumper doesn’t help much then. So this picture has been brought to you by an iPhone 4!
Solid State Relays
I switched from Fotek relays to PQLYT relays. They are supposed to be better quality. They also come with a clear protective cover and two fastening bolts.
Rotary encoder knobs
I ordered these 20 days ago, but they still have not arrived. They are purely esthetic, so I will start shipping orders without them. If I have not shipped your order before they arrive, you are lucky: you are getting one!
Connectors for your fridge wall
I bought a bunch of connectors that are easy to mount through a panel, so you can add connectors for the temperature sensors inside your fridge. They have a threaded ring to safely lock the sensor in place.
Shipping
I bought strong car board shipping boxes that fit through a mail slot. With these boxes I can ship your order with regular mail, which is a lot cheaper than parcel service. I also bought ESD safe bags for the shield and will wrap everything in ESD safe bubble wrap. This should ensure your order arrives in good condition. You can estimate shipping and taxes in your cart. Shipping is pretty cheap world wide. Taxes only apply to the EU.

Your order will ship in a card board box, well wrapped in ESD safe bubble wrap
Source code
I am almost done updating the source code for the new BrewPi Shield. The code now works for both the Leonardo and the UNO, no more separate source files.
More on the updated source code later.
Where is the shop? Or will a link be coming soon?
Elco,
Do you have a link or url to the brewpi store? I really want one!!!
I’m definitely keen to order one today, but I can’t see how to.
Where is the link to order?
Whoops, I forgot to click the save button for the menu bar. Link to the shop should be visible now.
Glad I’m not the only one who can’t figure out what the actual URL is….
My fault! I edited the menu in WordPress, but forgot to press ‘save’
looks like we were all too quick. I can see the link now.
Thanks Elco.
How do I add the soldering option? I am not seeing them on the shield product page, any one else have any luck?
Fixed now! I had it set to subtrackt stock. So my soldering skills were out of stock after the first order.
Awesome, thank you for working so diligently on getting everything running so quickly and smooth! I just ordered mine and looking forward to my first brew with BrewPi.
Thanks, Elco! Just ordered my BrewPi Shield.
Just placed my order as well!!! Cant Wait to finish it up and get her running on our test batch (water) then our real batches!!!!! via http://www.facebook.com/Deadcowboybrewing will def give a shoutout one we have it up and running!
Im thinking about using the UNO R3 would anybody recommend different?
Uno and Leonardo will both work. Leonardo is cheaper.
Sold many yet?
About 40 so far 🙂